
A Field Guide To Repairing Your Gear
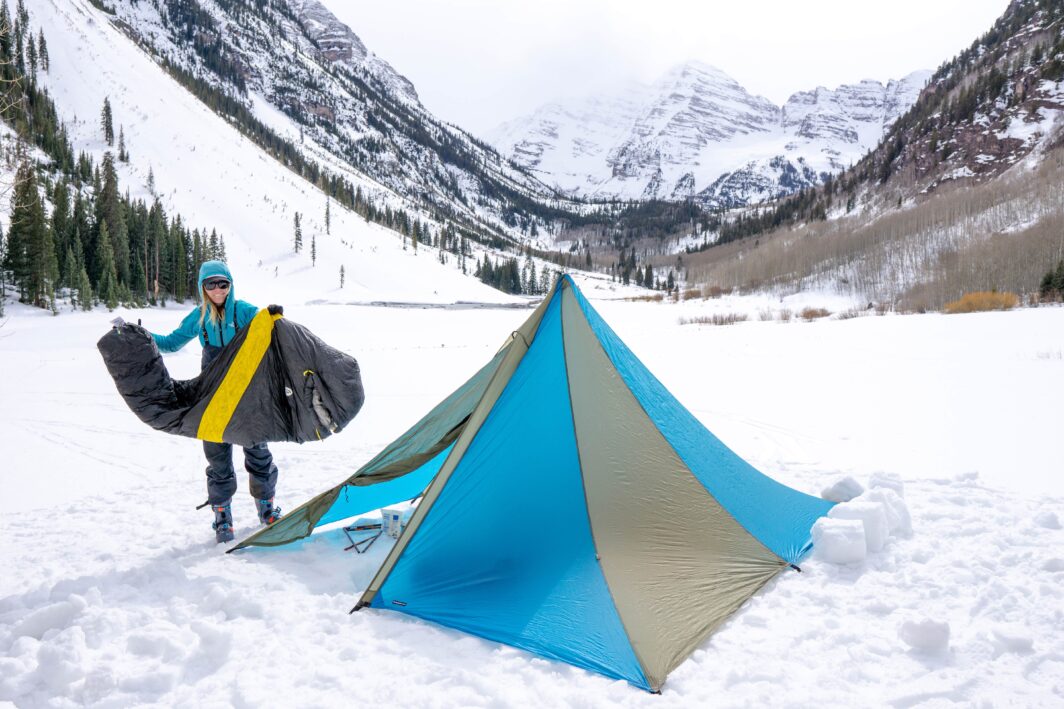
Photo Courtesy of Aidan Goldie-Ahumada
Share this Post
We’ve all been there; one minute you’re excitedly pulling your favorite puffy jacket on, ready to run out the door for a day of skiing, the next you’re staring in shock and frustration at the zipper, split wide open as cold air billows through the jacket. Outdoor gear, like everything, has a lifespan and suffers from overuse injuries and eventual retirement. But outdoor gear is often not just gear. It’s the skis you used on the deepest day of your life or maybe it’s a piece of equipment gifted from a friend or family member who’s no longer with us. For many different reasons, our gear often has more than just utilitarian value to us. With that, I’ve created a field guide to repairing your gear.
Why You Should Repair Your Gear
Beyond the personal value, keeping gear (particularly clothes) in use longer spreads out the environmental impact of that gear and keeps it out of the landfill. It’s estimated that the average American throws out over 80 pounds of clothes per year, and the vast majority of environmental impact (combination of carbon emissions, waste material, and other industrial pollutants) comes during production. The simple act of keeping a piece of gear in use results in dramatically decreasing the impact of the production.
In addition to working as a mountain guide, I’ve spent the past several years running a side hustle of outdoor equipment repair in Bozeman, MT. By my estimation, I’ve kept a few hundred pieces of gear out of the landfill. This is done by restoring functionality, patching holes, or modifying them to better fit the owner. That’s just a drop in the bucket, but it’s a step I’ve pursued in helping reduce our collective environmental impact. Additionally, repairing your old gear is often a significantly cheaper option than purchasing new. Whether fixing a piece of gear you’ve had personally for years or repairing a piece of gear bought at a second-hand store for cheap, keeping older gear in use lowers the economic barrier to participation in mountain sports.
Here are some tips, tricks, and techniques for preventing and fixing common problems with gear.


An ounce of prevention…
…is worth a pound of cure. Outdoor gear is no different. Some things you can do to prolong the life of your gear include:
- Regular washing per manufacturer recommendation. I like using the Nikwax products for things like synthetic jackets, down jackets, hardshells, wool, etc. Regular washing prolongs the life of soft goods by cleaning them of dirt, oil, and all the other schmutz that we accumulate in the mountains. Often a washing improves performance as well by increasing breathability, reviving a DWR coating on a hardshell, and re-lofting insulation.
- Brush and rinse zippers after big trips. Most zipper failures start with grit getting into the zipper teeth and slider. A quick rinse in warm water and brush with a toothbrush helps clear out abrasive material and prolongs the life of the zipper.
- As seams and cut ends of webbing age they start to unravel and fray. A pair of sharp scissors to trim loose ends and a lighter to melt and reseal ends will help stop fraying from spreading.
- Sunlight (UV rays) have a strong effect on the synthetic fabrics we rely on. Nylon in particular reacts poorly in direct sunshine. I have backpacks faded almost white by the sun. Store soft goods out of the sunshine when possible.
- Unstuff insulation at the end of the day. Insulation, whether down or synthetic, relies on the structure of the insulative material to puff up and create dead air space between the fibers. Those fibers break down a little bit each time we stuff down jackets into backpacks, or cram our synthetic sleeping bags into stuff sacks. Pulling your insulation out at the end of the day and letting it regain its loft will dramatically increase it’s lifespan.
- Dry gear completely before storage. Mildew eats away at fabric and moisture can cause corrosion to metal pieces if left packed away. Make sure to hang dry items before storing them for any length of time.
But everything we carry in the mountains is a tool, not a jewel. Clothes and packs wear out, get holes, lose their loft, and get sun-bleached. It’s part of the game. But with intentional and proactive care and a little bit of elbow grease, it’s possible to significantly prolong the life of gear with relatively little effort. Here are a few examples of common problems, easy step-by-step fixes, and recommendations for tackling more involved issues when repairing your gear.
Repairing Zippers
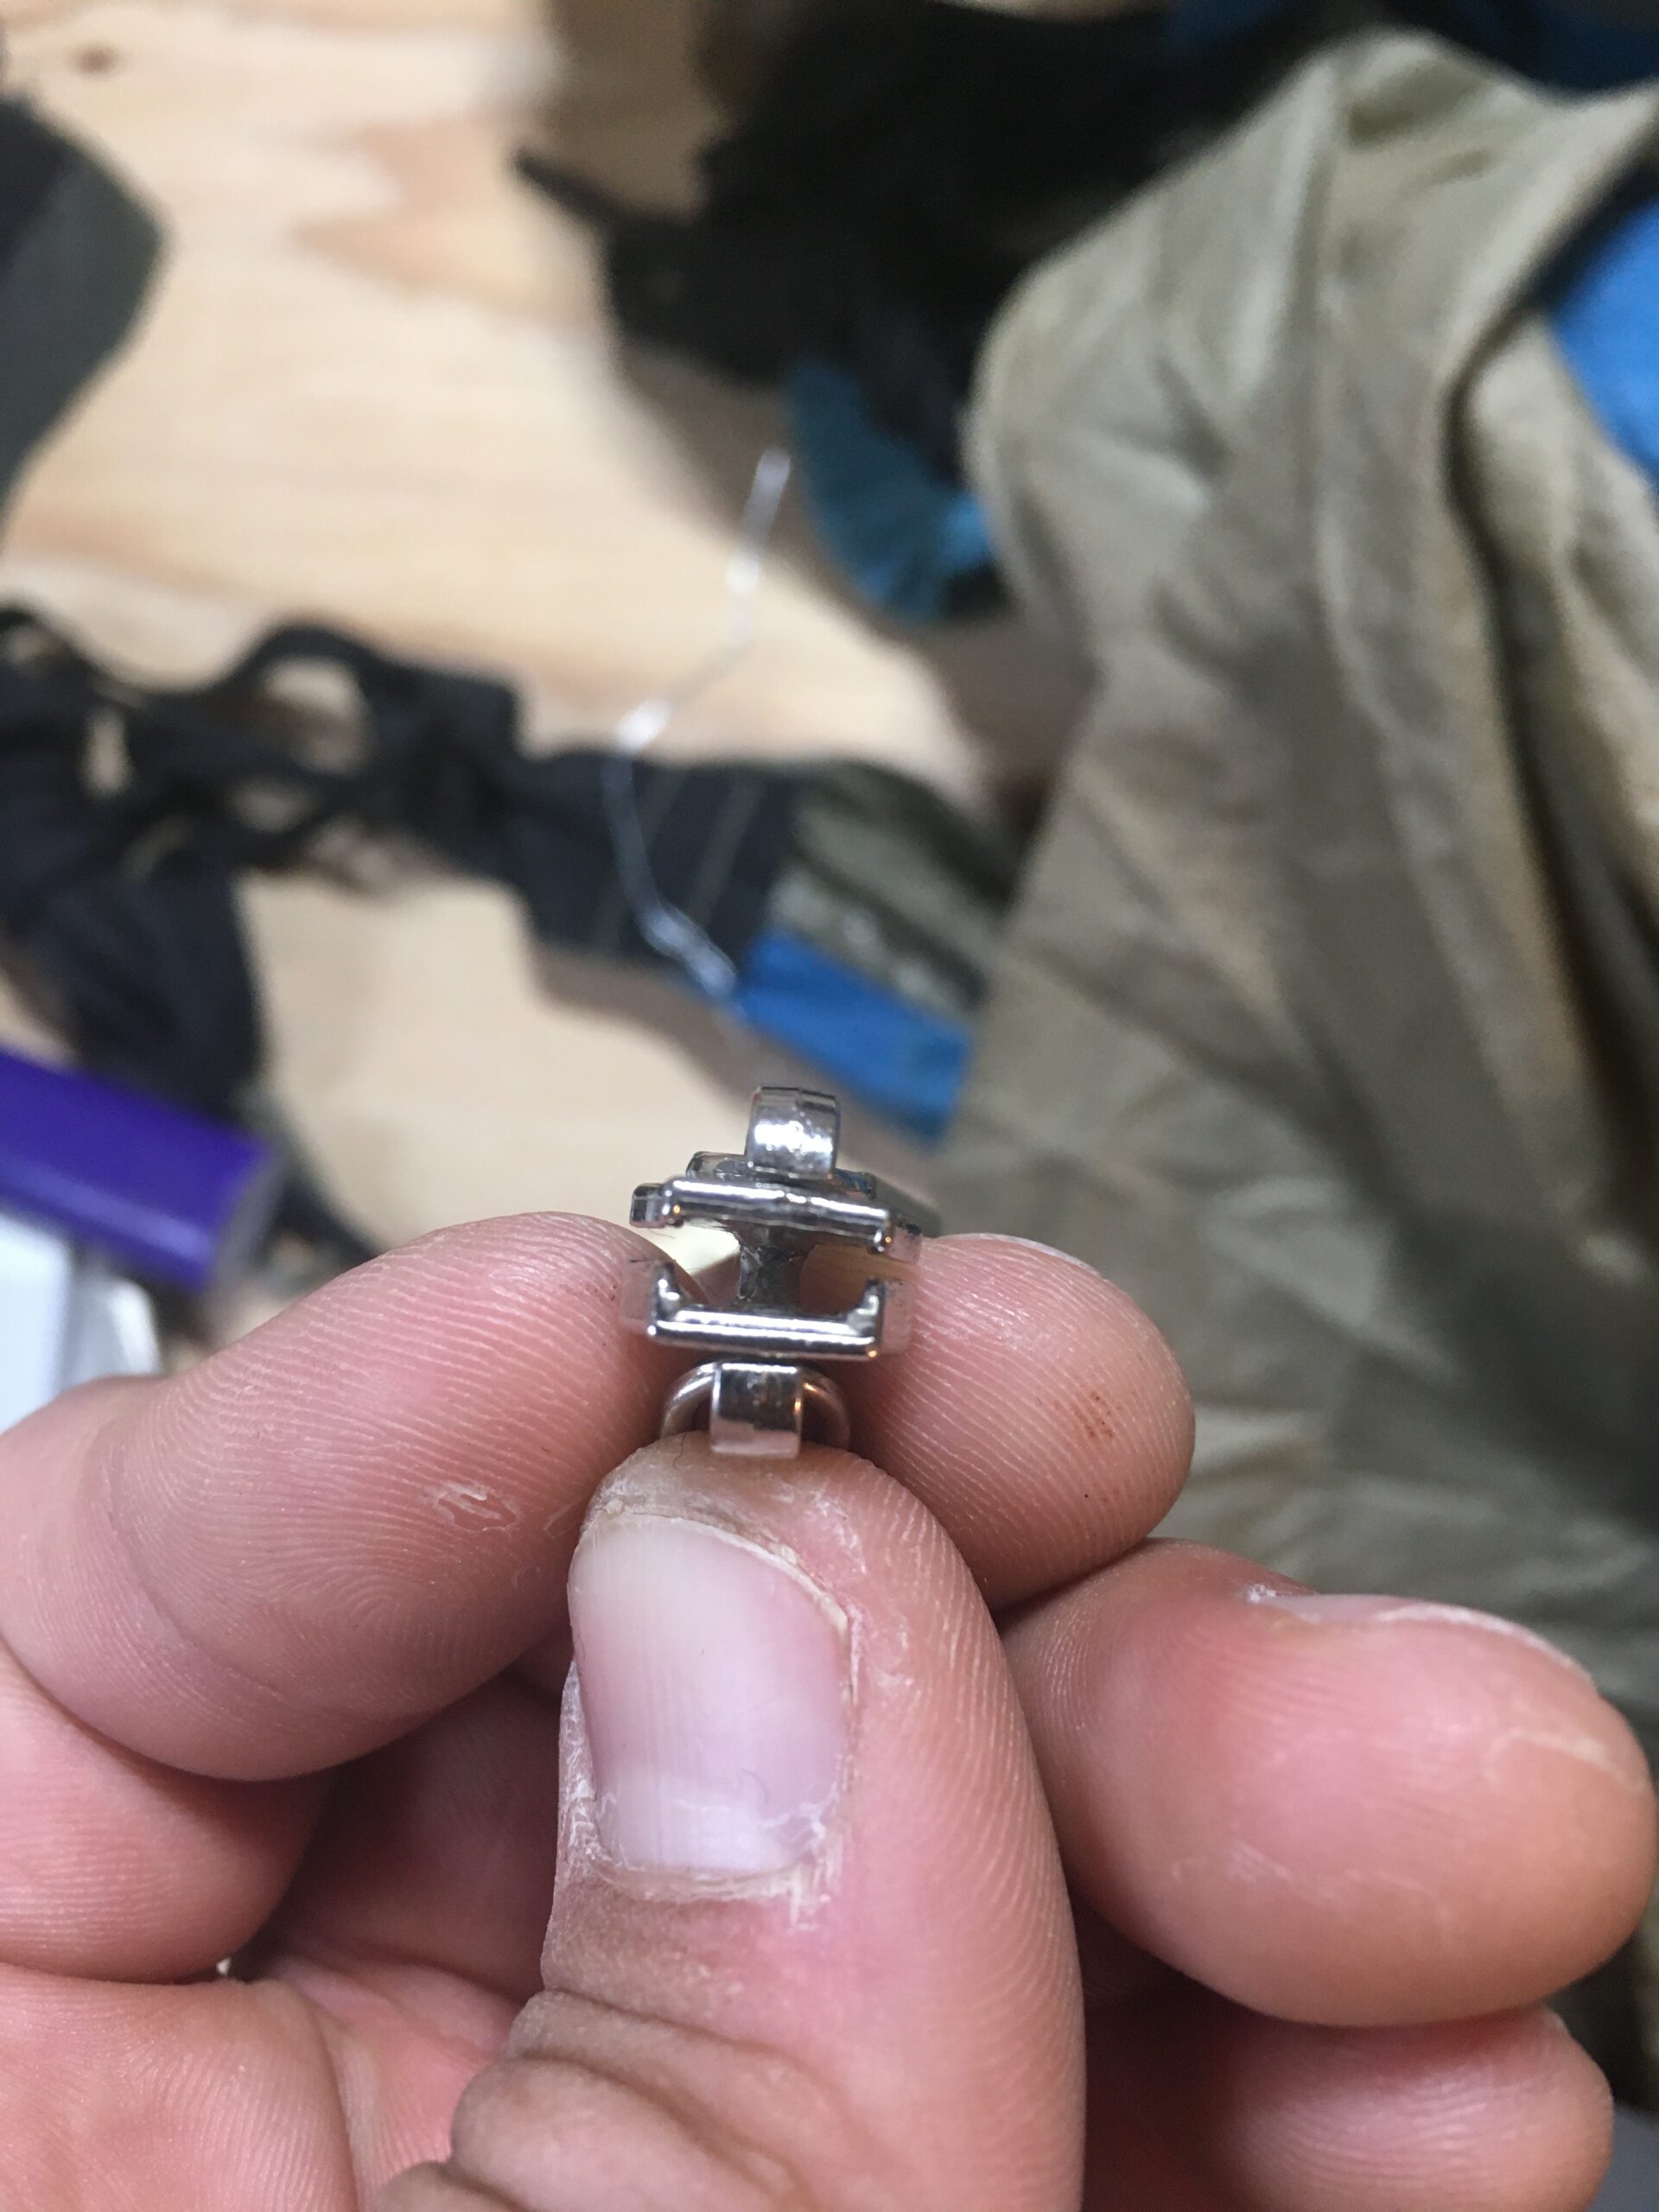
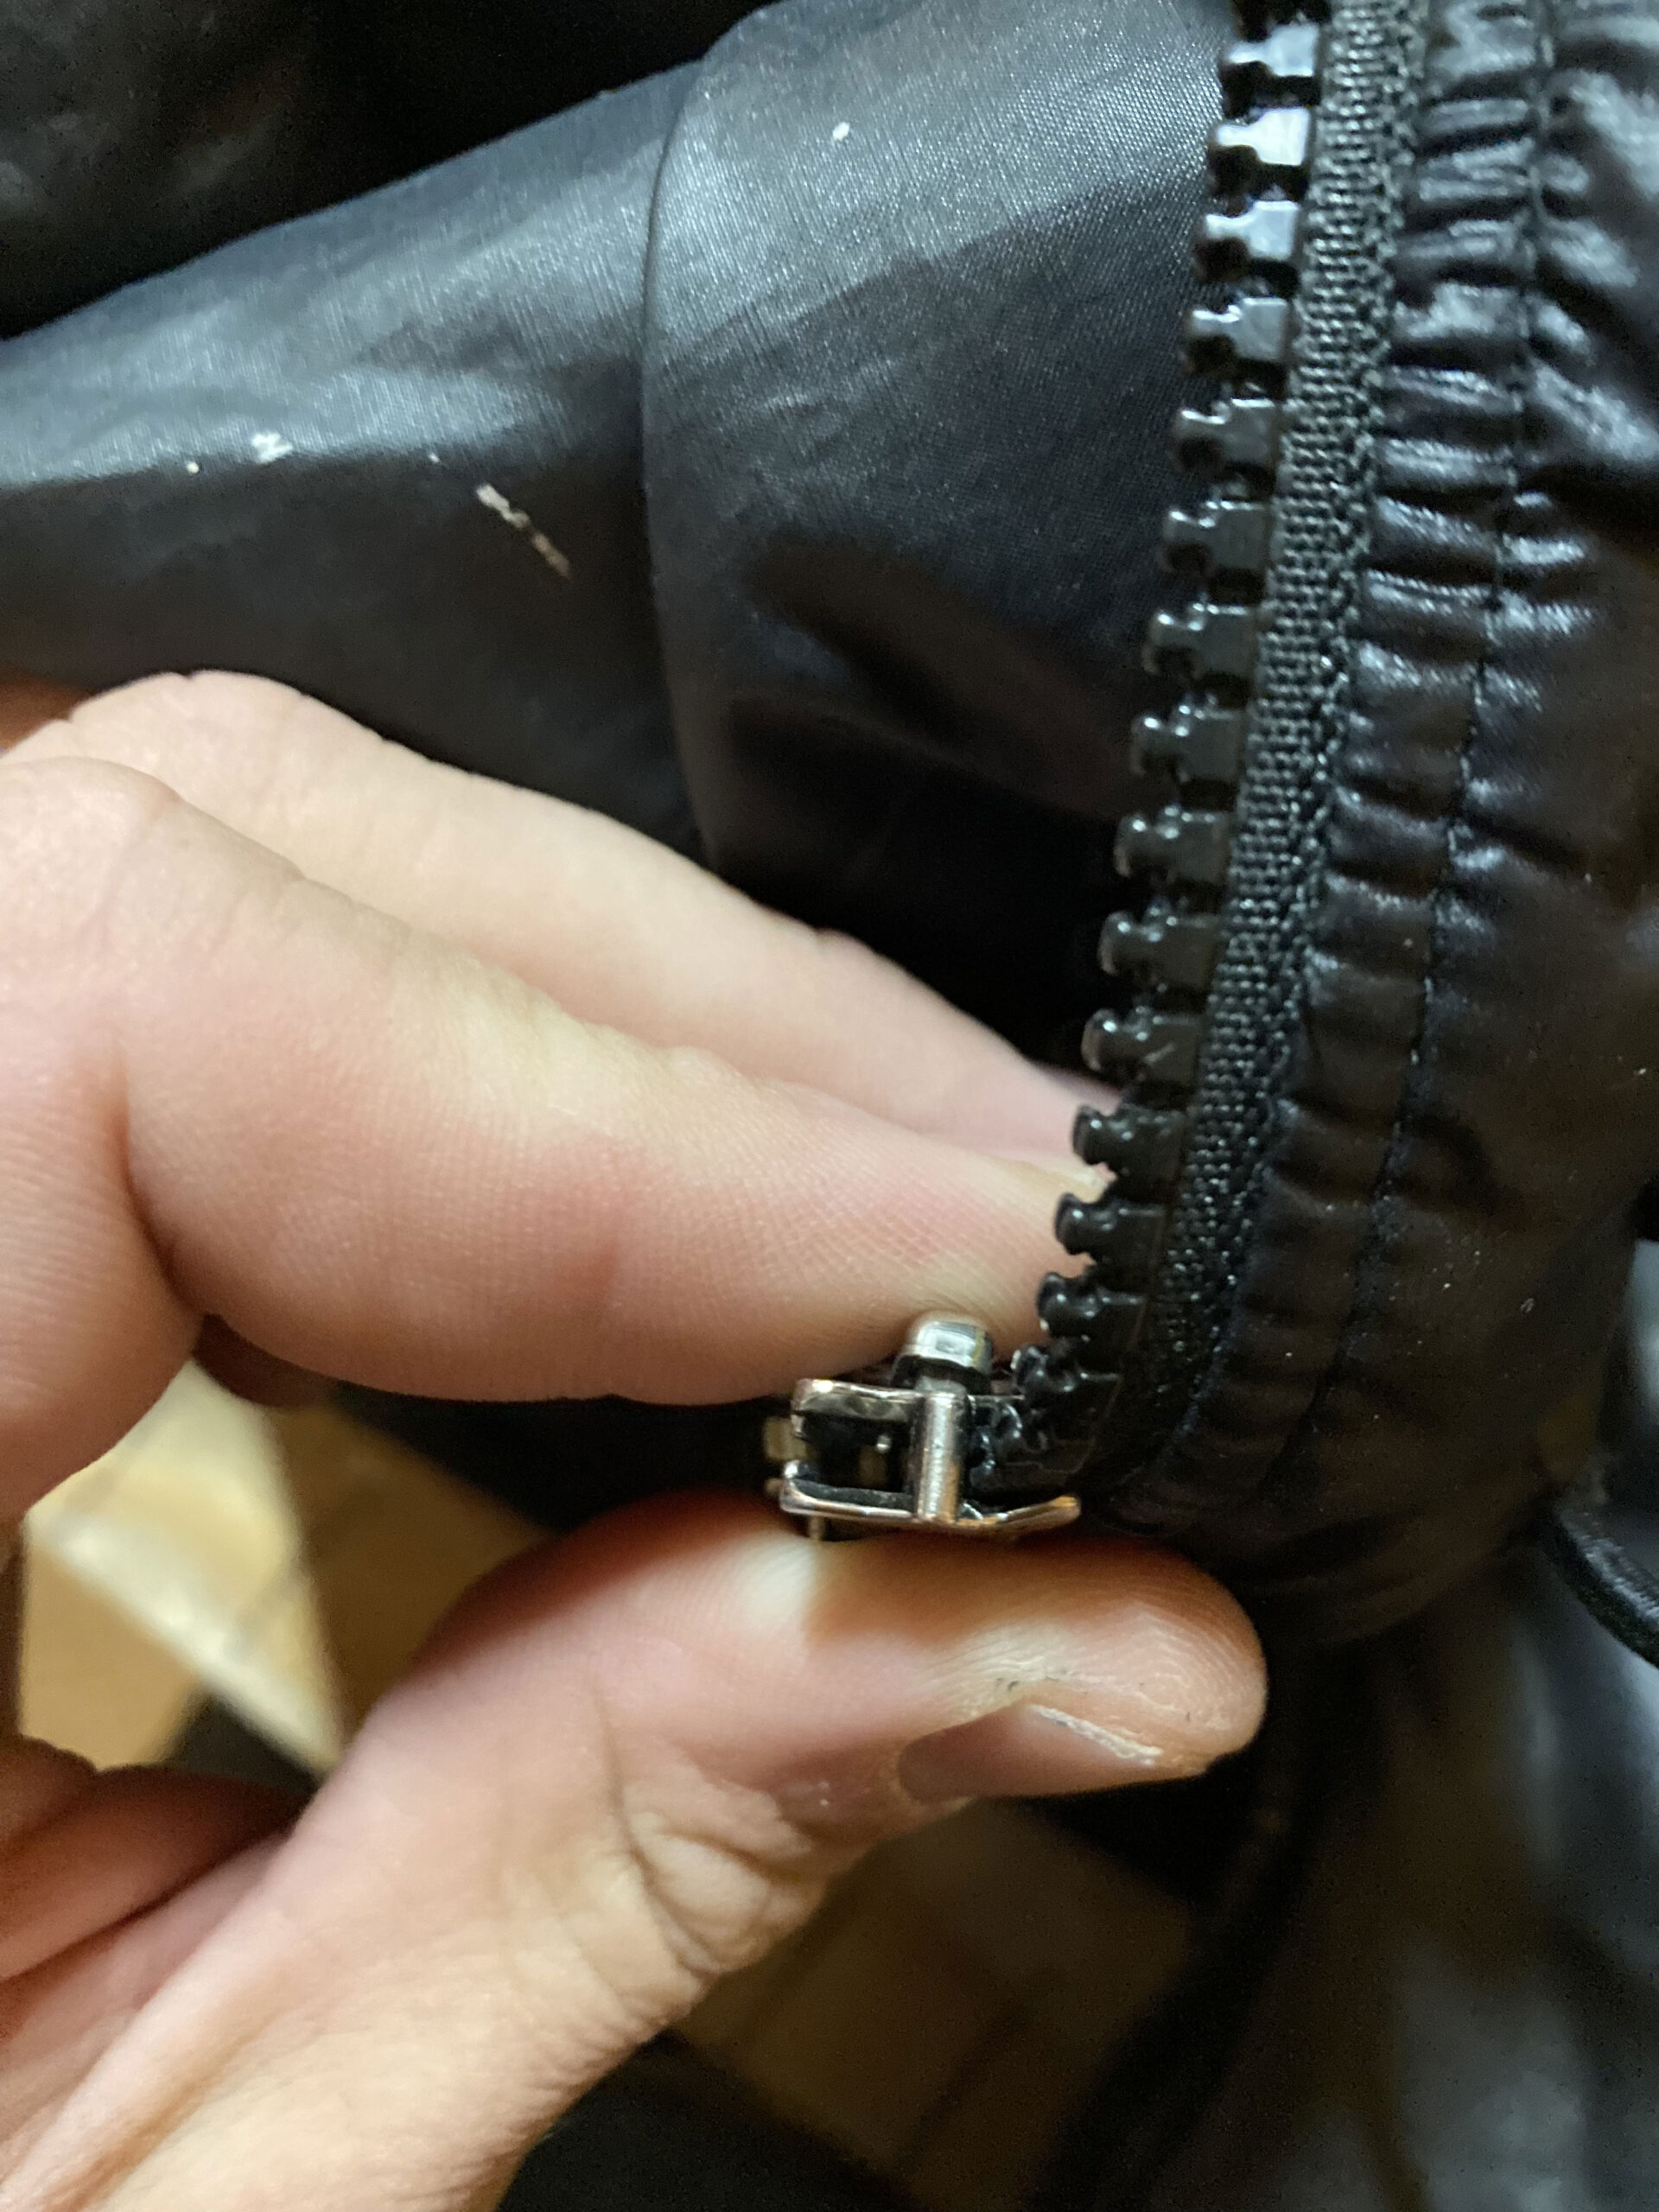
The most common zipper problem is a worn-out slider. The symptoms of this include; difficulty getting the zipper teeth aligned when starting to zip; zipper teeth failing to engage when zipped; or teeth over-engaging and ballooning outwards when zipped. Zipper sliders have a specific spacing between the plates of the slider. Over time the material on the slider wears down and the gap widens. This means inconsistent pressure on the zipper teeth and inconsistent zipper performance. If this happens, there are a couple of quick fixes.
- If you’re in the field and you need to get your jacket on, try gently pinching the front and back plates of the slider between your fingers as you zip the jacket. By pinching with your hands, you push the plates together and can usually get the zipper to engage.
- Another common field fix is to use a pair of pliers to squeeze the plates of the slider back together. I don’t recommend this as it’s way too easy to squeeze too hard. At best, you’ll get a handful of uses out of the zipper before it fails again. At worst, you’ll either crack the slider, or compress the teeth of the zipper and damage them. This will result in the need for a full zipper replacement.
- When at home, the best thing to do is replace the slider itself. On a jacket with a separating slider, this is one of the easiest fixes to do at home.
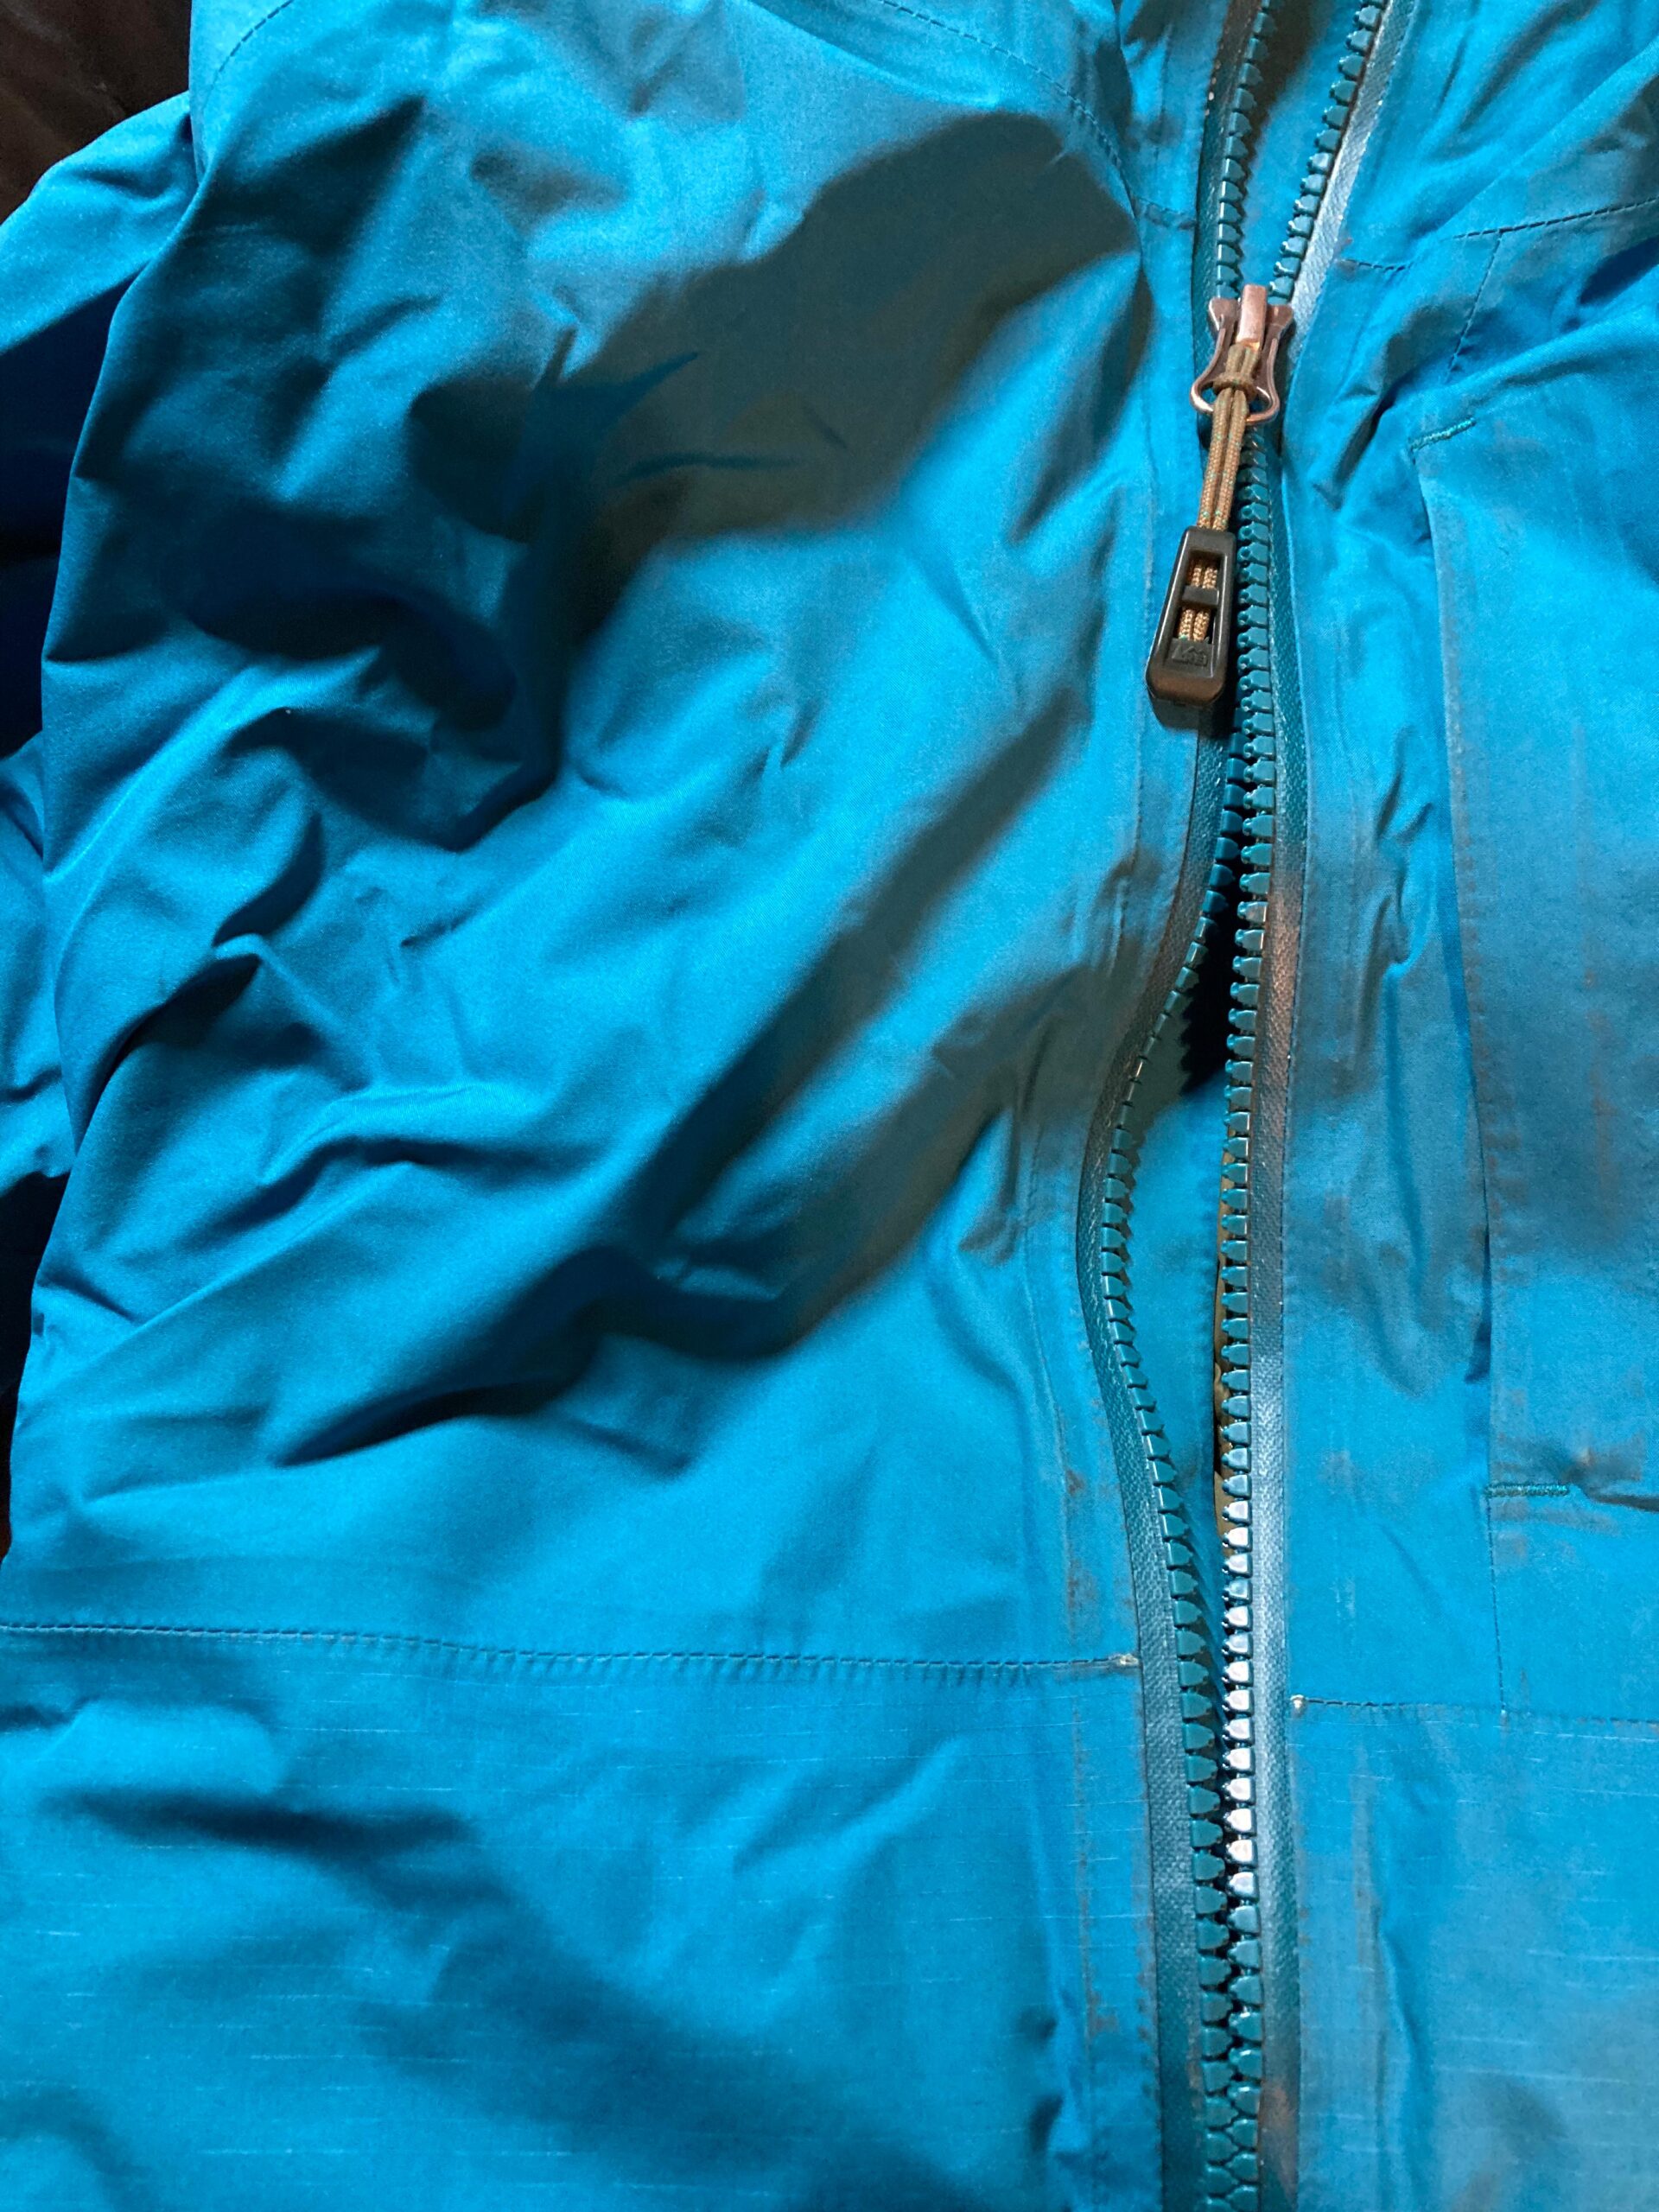
Zipper Replacement
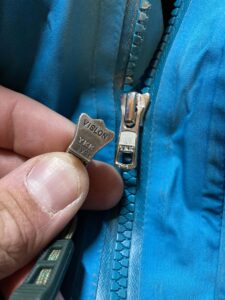
- Identify the zipper size and type. The slider should have a code imprinted on it, an example is shown to the right of a YKK #5VS slider. Do a quick online search for that specific slider.
- Pro-tip: the “quick zipper fix” and “universal zipper repair” kits don’t really work. Knock-off brand sliders are also often poorly machined and don’t have the right tolerances. Taking the time to find the same brand slider as the original is absolutely worth it, and the price difference is usually only a few cents. A couple sources for zipper sliders I use include:
- With the zipper separated, use a pair of scissors or wire cutters to remove the top stop of the zipper above the slider.
- Run the slider up and off the zipper teeth.
- Gently put the new slider on in the same orientation as the old slider.
- Use a pair of needle nose pliers to crimp a new top stop into place to keep the slider on the teeth.
- All done! Check your work and revel in the sensation of repairing your own gear.
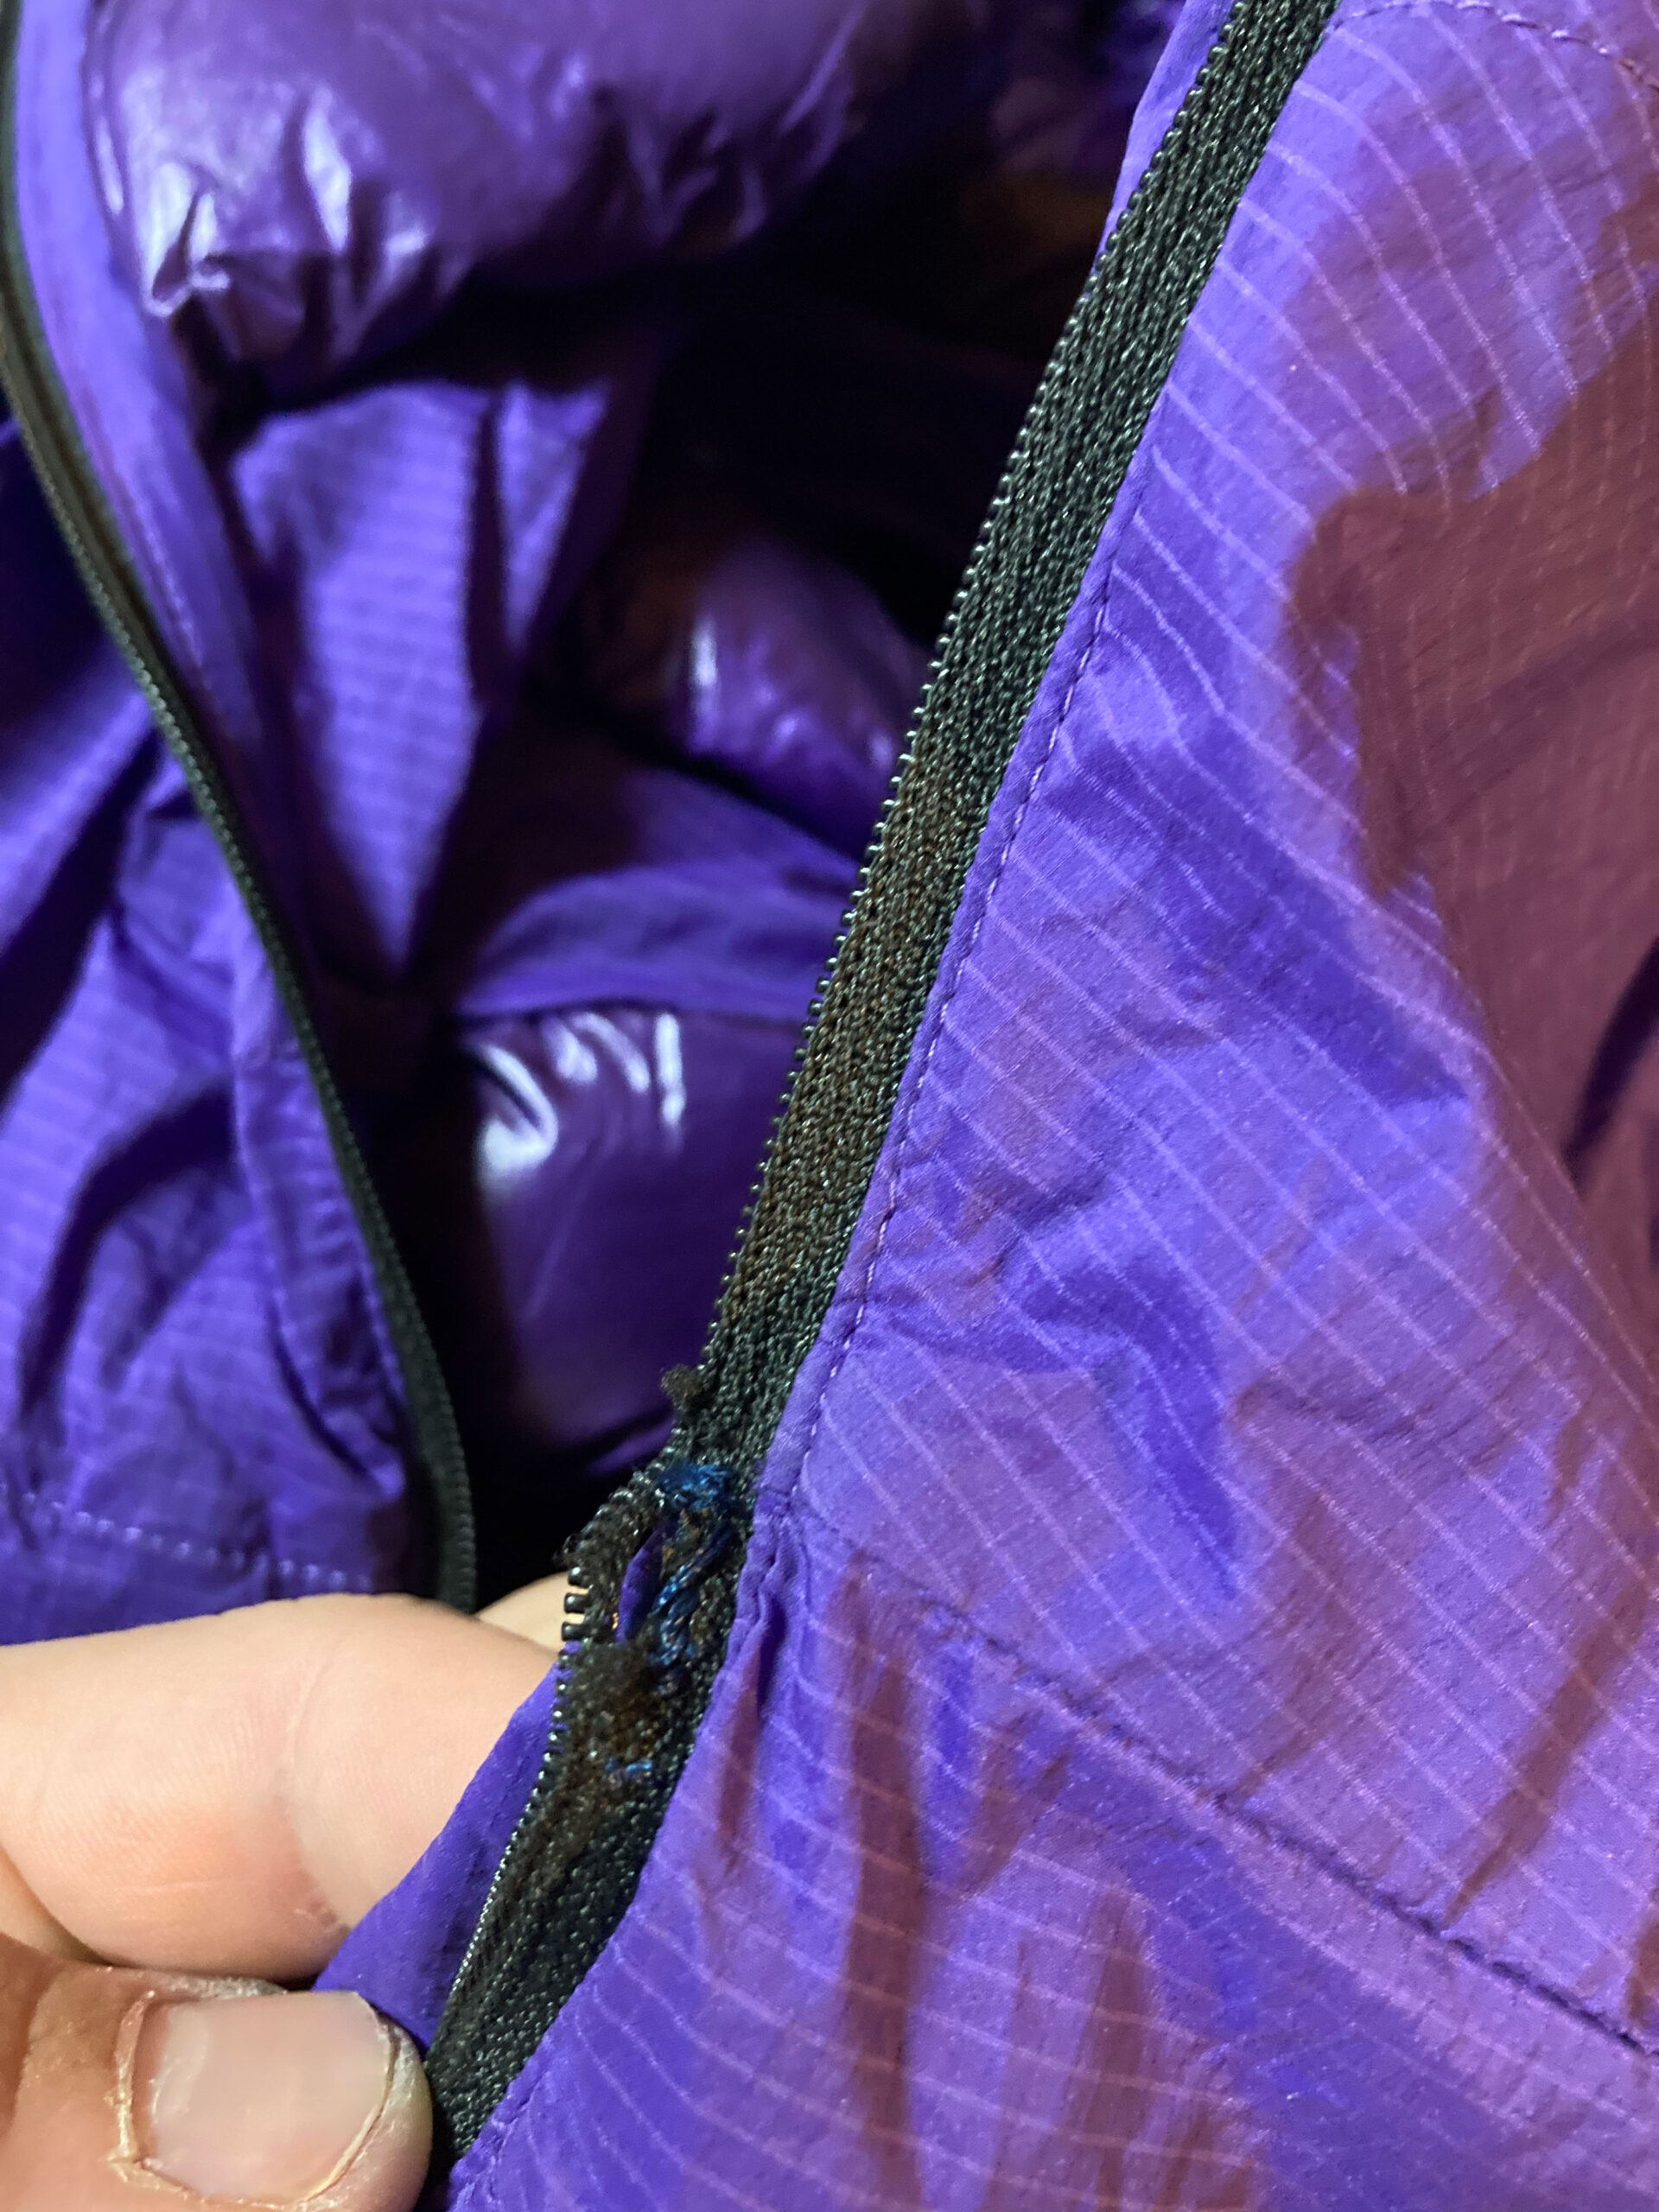
Another common problem is broken or missing zipper teeth. Ultimately, this requires a zipper replacement which is more challenging and intensive than just fixing a slider. But there are some workarounds and field fixes as a stopgap:
- On a coil zipper, sometimes you can very gently bend the teeth back into place. If possible I’ll use a sharp razor blade to trim off any burrs or nicks on the teeth before trying to zip it again. If you happen to have some sandpaper to smooth out burrs, that sometimes works too.
- On molded zippers with missing teeth, the only recourse is zipper replacement.
- For either coil or molded teeth, a quick option is just to shorten the functional length of the zipper. Just because you used to zip the jacket all the way up to your chin doesn’t mean it always needs to go that high. You can use a zipper top stop to stop the slider from traveling past the broken teeth.
- For a zipper replacement, you’ll need a sewing machine, scissors and seam rippers, a new zipper, and a boatload of patience for a full replacement. A sewn-on zipper replacement is also possible and involves significantly less jacket surgery. If that’s a project outside your wheelhouse, there are many small, local businesses specializing in outdoor clothing repair, and many that accept mail-order items.
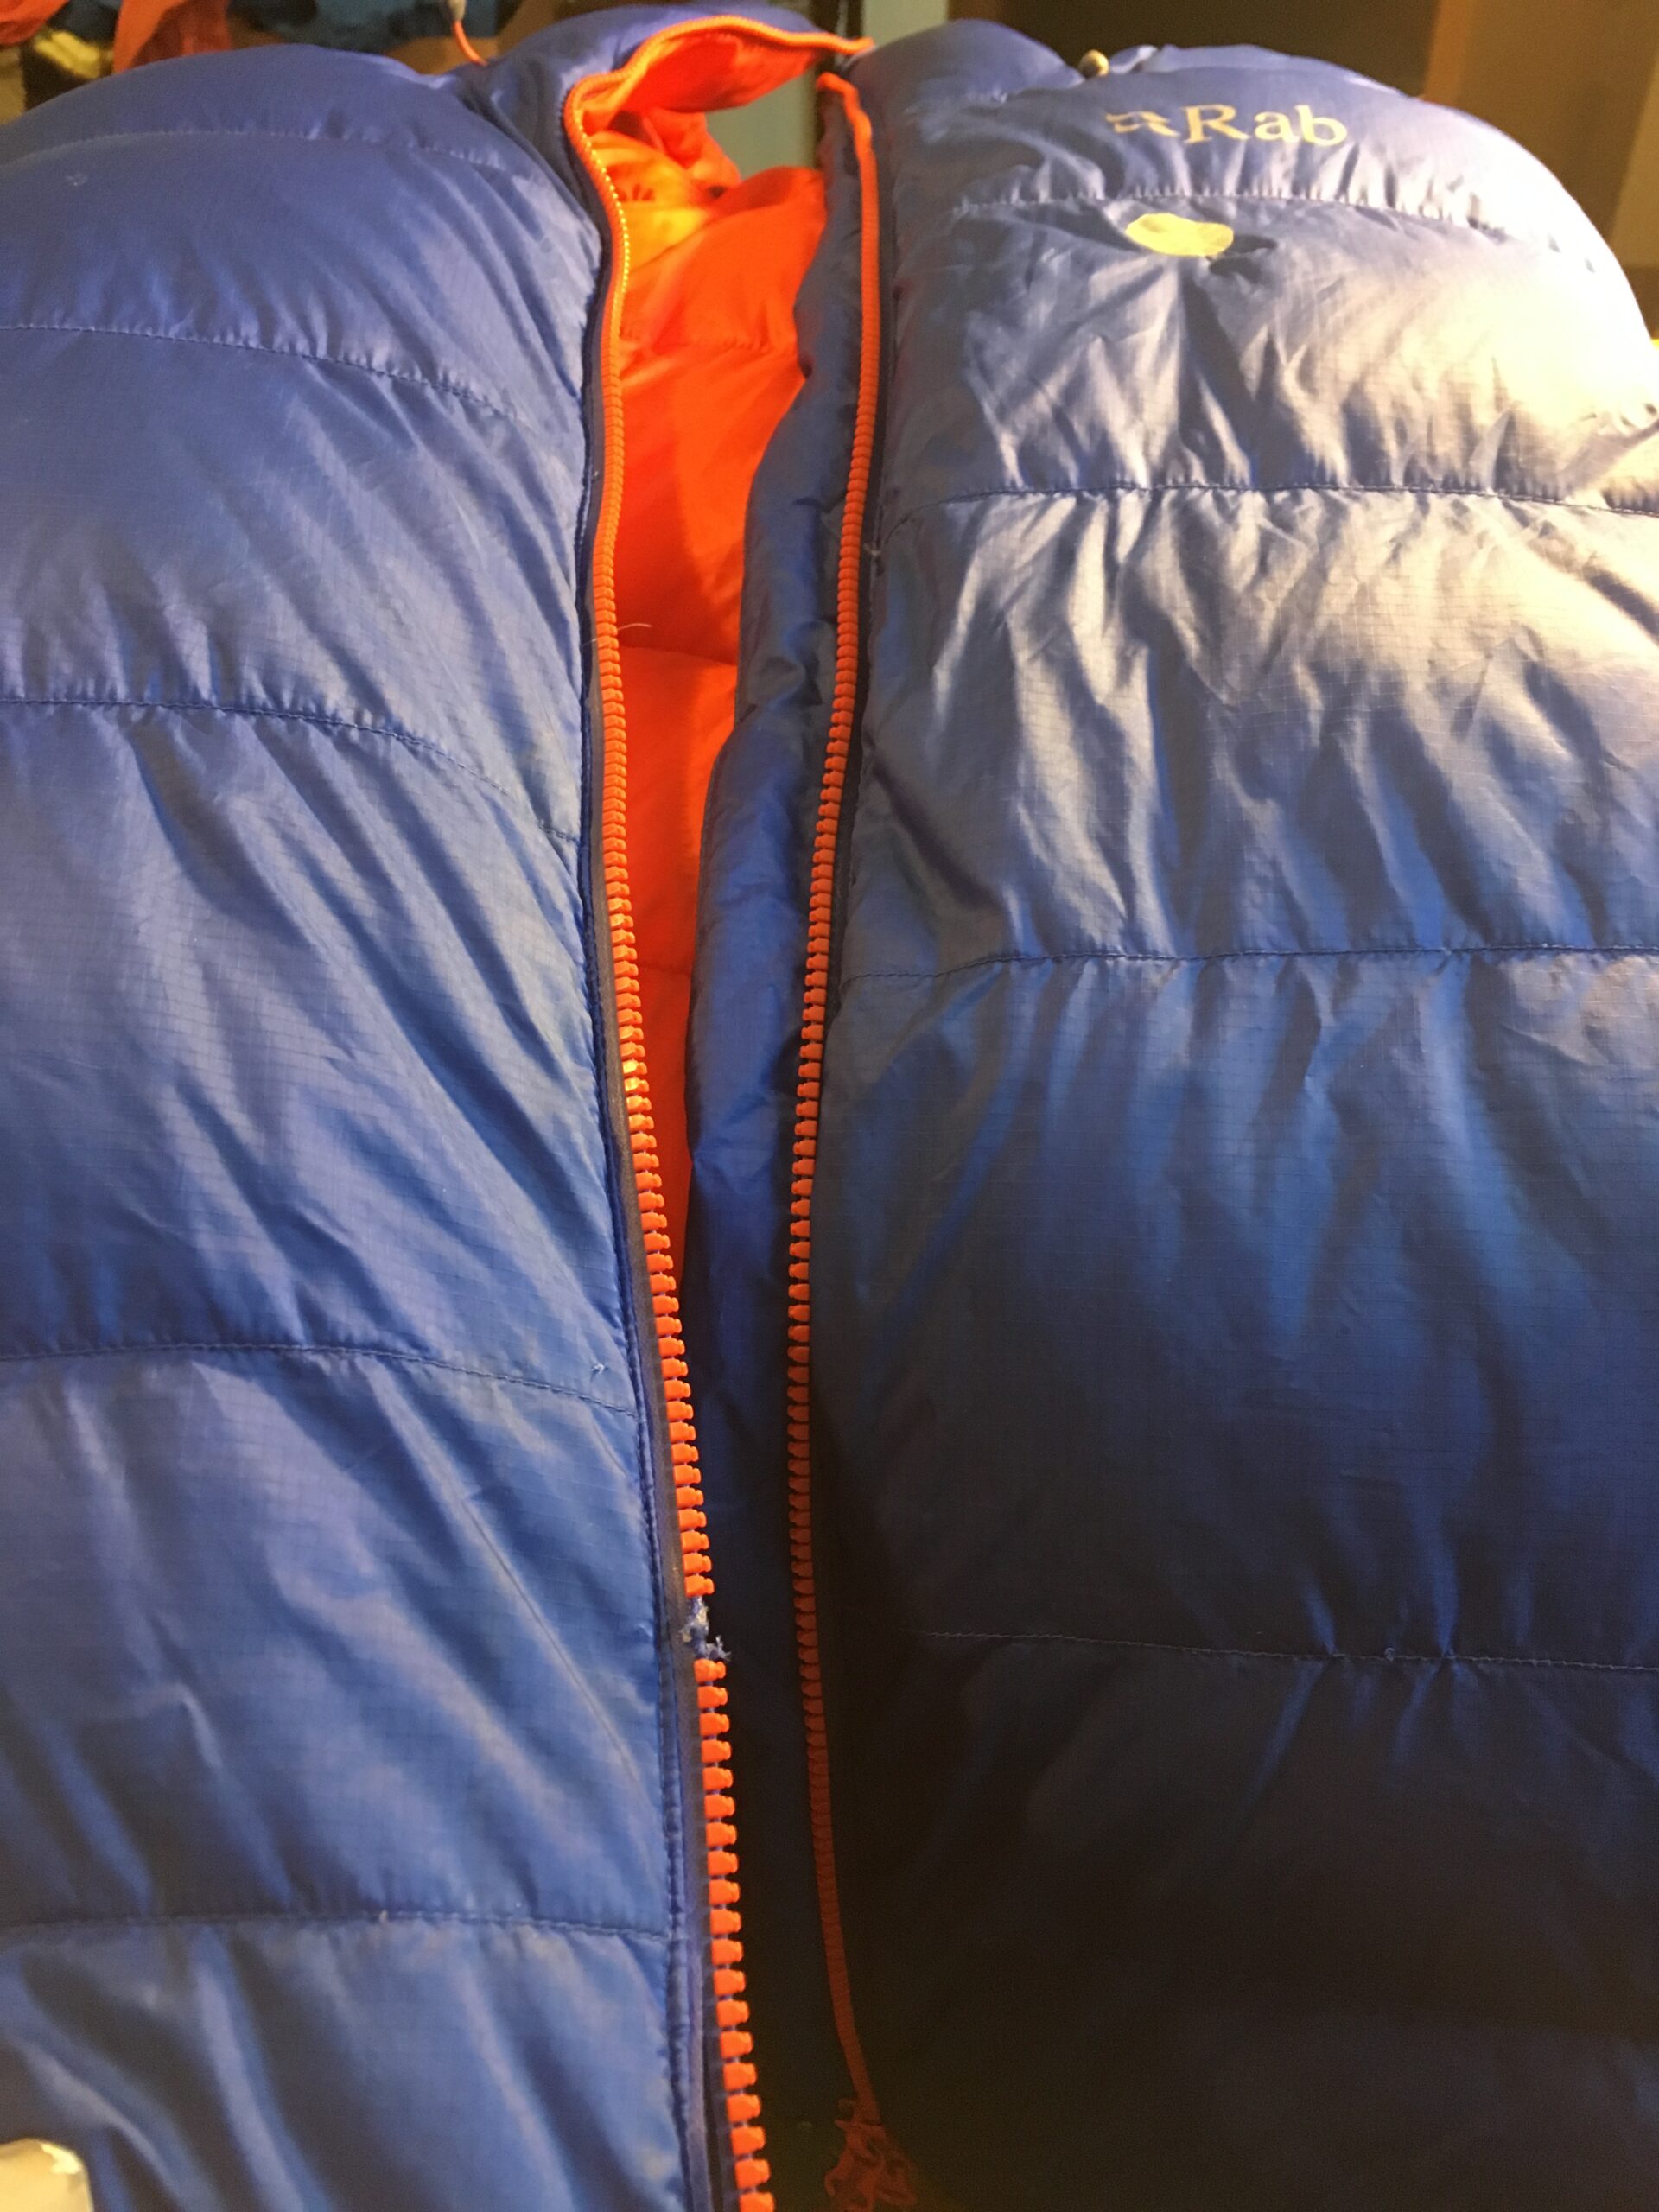
Photos of the most common Zipper Issues
Patching
The dreaded feather hemorrhage. The worst nightmare of anyone with a down coat. Or the gaping tear in your Gore-Tex hardshell. Whatever the tear, it’s a bummer to see. But fortunately, simple patching is a fix that often takes more patience than anything else. Generally, patch jobs fall into two categories: adhesive patches and sewn patches.
Adhesive Patch Repairs
Adhesive patches are nice for small areas, ragged edges, or quick fixes. The best adhesive patches are specially made for outdoor use from nylon or polyester face fabrics that are close matches to the original fabric. The two best options I’ve used are the patches made by NoSo Patches and the ones made by McNett and marketed as “Tenacious Tape.” Duct tape may seem like a tempting option, but it leaves more adhesive residue and doesn’t last as long as a well-applied specialty patch. But on the flip side duct tape is inexpensive, readily available in any hardware store, and easy to work with. Just know that a duct tape patch will result in significantly more work later if you choose to either swap to a specialty patch or a sewn patch.
- To do a good adhesive patch, first, make sure the area is clean and free of loose threads. Use a pair of scissors to trim the edges, give the damaged area a wipe down with an alcohol prep pad to clean the surface, then let it dry.
- If working from a roll of patch material, carefully cut a piece slightly larger than the hole and make sure to round the corners. If working with pattern patches, just pick one that looks good and covers the hole.
- Carefully remove the backing to the patch. I’ve found it’s best to use the backing paper as little handholds to avoid touching the adhesive directly with my fingers.
- Center your patch over the hole, set the middle down, then slowly start working your way out from the middle, pressing the patch smooth as you go.
- Once the patch is on, let it cure, either by putting the garment in the dryer for about 10 minutes on low heat, using a hairdryer or setting the garment in a warm and sunny spot. Patches without a heat-set do not last as long.
Sewn Patch Repairs
Sewn patches work well on longer tears, tears with missing material, or tears in high-stress areas. Again, a sewing machine is the best tool to use, though it’s certainly possible to hand-sew durable and effective patches. Here’s a couple of pro-tips for nailing a sewn patch.
- Use a sharp pair of scissors. This helps reduce the fraying of the patch and base material.
- Sil-nylon is notoriously slippery to work with. Patience, a handy supply of pins, and either an iron set on extra-low or sharp fingernails are key to getting the edges folded neatly.
- If you need to open up a seam to gain access to a patch, use a pair of seam rippers to carefully undo the stitching. Don’t go further than you need as it will be more effort to re-sew.
- Use a sharp needle, slow speed on the sewing machine, and keep light tension both in front and behind the needle. This helps prevent the bunching and slipping of the fabric.
- When patching, use tailors chalk to make sure panels align. Mark several locations along the length of the patch or seam.

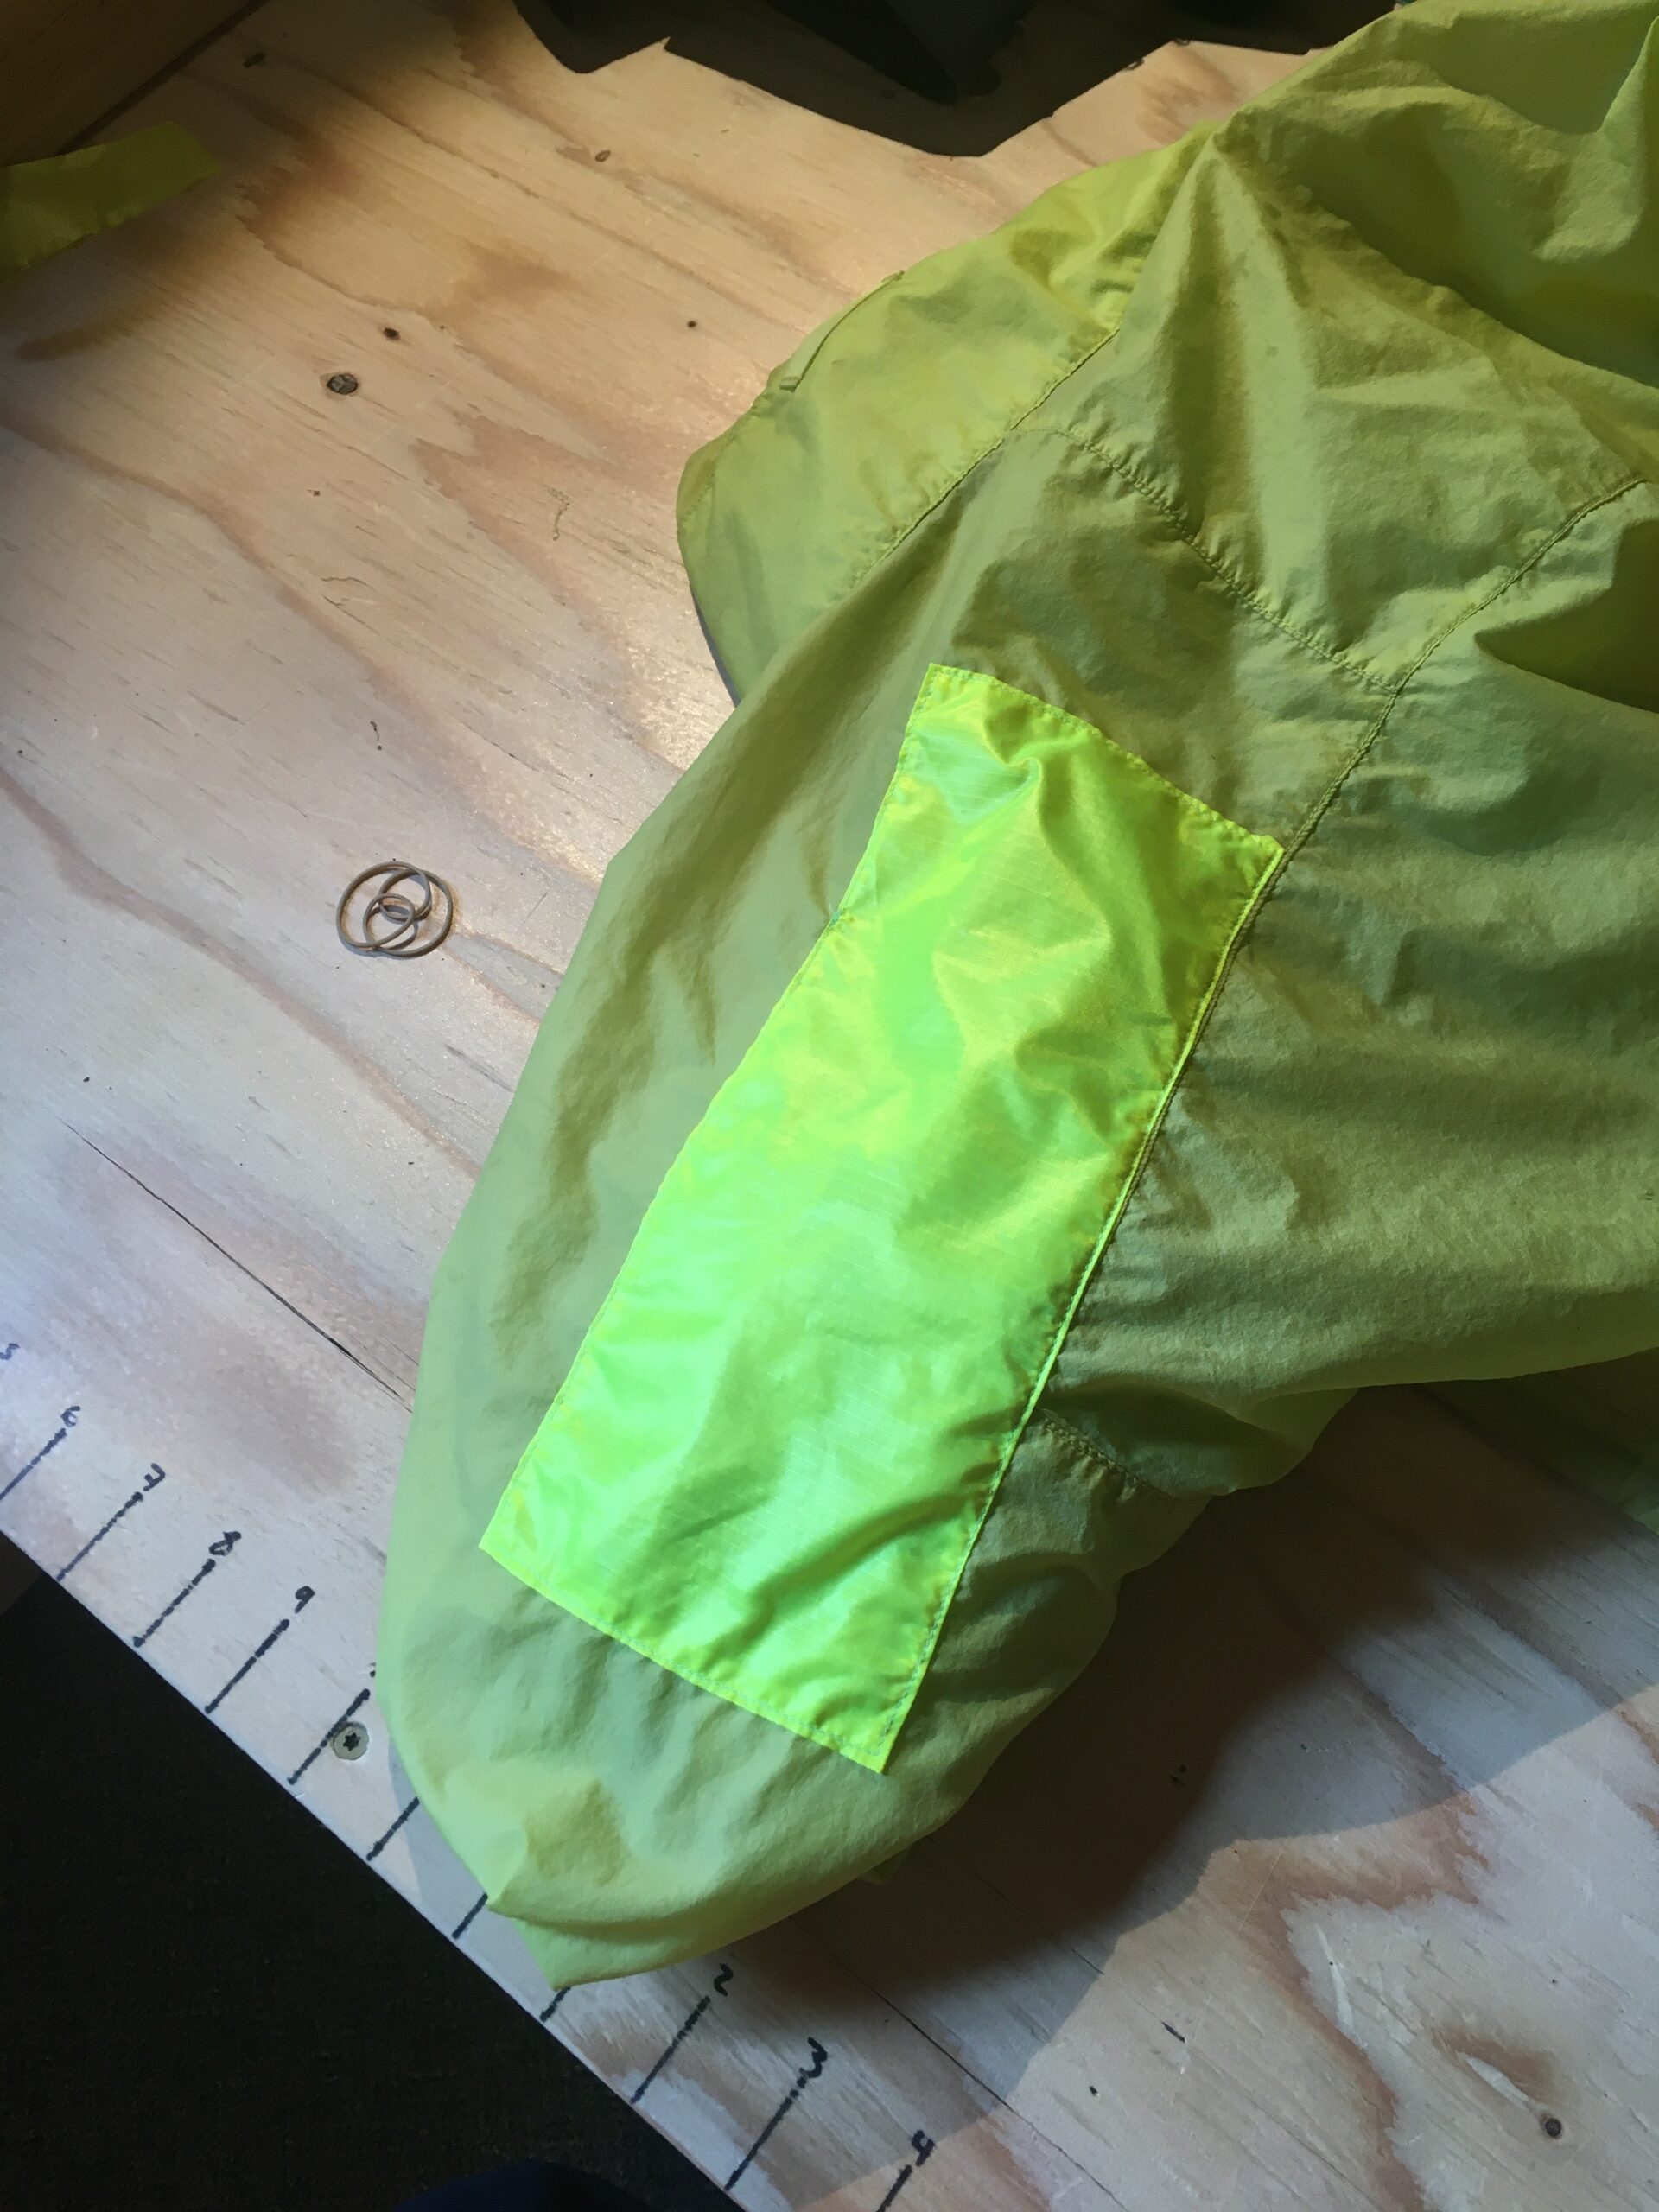
A Sewn Patch Repair
Why Put In The Work?
Ultimately, keeping gear in use longer through effective repair takes commitment and creativity. In our world of online shopping and instant gratification, it’s often easy to purchase something new with a few clicks rather than repairing your old gear. Much like backcountry skiing though, the process is part of the reward. There’s nothing like a long day spent touring through quiet woods to a remote summit. I find similar peace of mind sitting down behind the sewing machine and spending a few hours getting lost in repairing your gear.
Here are additional resources for repairing your gear:
- iFixit guides to clothing repair, including some instructions from Patagonia.
- The Mending Life, a handbook to clothing repair.
- Arc’teryx FIXED, a series of videos demonstrating common gear fixes and care.
- www.craigslist.com, the best place to find a used home sewing machine to get started.
About The Author
Matt Zia
Location: Bozeman, MT
Top Gear Picks: Charger Ace 178cm / V8 186cm / OG Drifter 182cm with TTS
Website: www.montanamountaineering.org
Instagram: @ziapet / @montanamountaineering
Matt is a professional mountain guide and educator in the Greater Yellowstone Ecosystem, and is an AMGA Certified Rock guide and Assistant Alpine/Ski guide. He plans to finish his IFMGA certification and is one of only a handful of telemark ski guides. He currently works for Exum Mountain Guides and for the Montana Mountaineering Association, for which he is the Executive Director. As a person of mixed Chinese and American descent, he knows the importance of identifiable mentors in all aspects of life, both in the mountains and the valleys.
Matt’s passion for backcountry skiing lies in long adventures far from the road, and he counts bear spray as an essential part of his spring skiing kit. He can usually be found exploring the Greater Yellowstone Ecosystem with skis on his feet or ice tools in hand.
Share this Post