

Avalanche Forecasting 101
Share this Post
Do you want to go on a hut trip to the remote backcountry of British Columbia with your buddies? How about an expedition to ski from the summit of Denali? If so, you’ll need to be your own avalanche forecaster. And if that sounds like work, it’s because it is. But don’t let this scare you. With practice and persistence you can use avalanche forecasting techniques to make smart calls in the backcountry, even in foreign terrain.
Avalanche Forecasting is all about making educated opinions about what the likely avalanche hazards will be. This involves looking into the past to interpret a complex set of details (or lack thereof) and formulating an opinion on how future weather will affect the avalanche hazard. It’s a bit like a game of high stakes poker, and it’s an intimidating prospect to recreational backcountry travelers and industry professionals alike. Luckily, the dirty secret of avalanche forecasting (not decision-making in the field) is that you don’t have to be right… but you can’t be wrong.
You don’t have to be right but you can’t be wrong?!
Yup. Let us remember that high stakes game of poker and think about our decision making in bets. We can lose a few bets here and there and not lose the game, but if we go all-in we’d better be right… because the stakes are high. Our small bets are our snow-pit tests and test slopes. It’s ok to be wrong here. We actually learn from getting it wrong. What matters is how we look at that mistake and incorporate new information to form an updated opinion (or in this case a better avalanche forecast.) Like most things, this is better practiced in your home mountains before trying to forecast on your first big expedition.
In order to start avalanche forecasting we need to learn a few basic principles regarding snow metamorphosis (how the structure of snow changes within a short time), snow mechanics (the forces and displacements of snow), and how changes in weather can affect these aspects. Recreational avalanche 1 and 2 classes will provide the best foundation for learning these skills. Find local avalanche education courses here.

Getting Started
First things first – get a notebook and develop a routine. A write-in-the-rain notebook is the norm, but some folks are also using phones successfully. Whatever you choose, make sure you can use it in the worst of weather. Your notebook will serve as a reference tool for you both in the field and at home. Start a routine of recording this information before you leave home:
- The weather and snow info from the last 24 or 48 hours
- The weather forecast
- Your avalanche forecast
The weather history and forecast can include many things but at a minimum should include:
- Snow amounts
- Snow Water Equivalent (SWE)
- Wind speed and direction
- Max and min temperatures
- Cloud cover
As your system develops you can add or subtract information as you see fit. This notebook is essential to improving your forecasts, so do your best to keep it well organized.
As a forecaster, I find it easiest to break this information down in terms of avalanche problems. These problems classify avalanches not only by type, but also by the weather pattern that forms them, their distribution in the terrain, the possible size, and what observations might be useful or alternatively unreliable.
Avalanche Problems: Non- Persistent
Typically, non-persistent problems stabilize in hours to days.
Storm Slab
Storm slabs are generally formed during storms with a warming trend. These are soft slabs. This problem can be elevation-dependent due to different snow amounts. Tests are generally reliable. It is commonly accompanied by a wind slab.
Wind Slab
Wind slabs are formed by wind compacting snow into a slab over weaker snow. These slabs can be soft and/or hard. Wind slabs can be formed in winds as light as 10mph, but wind averages of 25mph typically get my attention. This problem is aspect and elevation-dependent and can be formed on clear days with moderate wind. Tests are generally reliable.
Dry Loose
Dry loose avalanches are formed by cohesionless snow on the surface. Typically formed during storms with low winds and low-density new snow these point release avalanches are generally small but can be troublesome in more exposed terrain. This problem is generally elevation-dependent
Avalanche Problems: Persistent
Typically, persistent problems stabilize in weeks to months.
Persistent Slab
Persistent slabs are formed when snow forms a slab over a persistent weak layer (PWL). The PWLs are typically formed in three places; at the base of the snowpack, around crusts, and on the surface during periods of high pressure. An understanding of snowpack metamorphosis that includes near-surface faceting processes, surface hoar formation, and faceting around crusts is crucial to understanding the distribution of these avalanches. Information on these subjects can be found by searching the ISSW library or in a local avalanche class. Tests are generally less reliable.
Deep Slab
Deep Slabs are persistent slabs’ big brother. As the name implies, Deep Slabs have a PWL buried at least 1m below the surface. Tests are generally not reliable.
Avalanche Problems: Wet
Typically, wet problems stabilize with below-freezing temperatures.
Wet Slabs
Wet slabs are the product of a loss of strength due to liquid water in the snowpack collecting in a particular layer a.k.a. “the funny business.” The funny business is usually an old PWL, and the liquid water can come from warming from the sun or air temperature, or a rain event. This problem is aspect, elevation, and time-dependent. Tests are generally less reliable
Wet Loose
Wet loose avalanches are the product of a loss of strength at the surface of the snow. This can be caused by warm temperatures, the sun, or rain. This problem is aspect, elevation, and time-dependent.
Putting Pen to Paper
As forecasters, our weather info gives us much of the information we use. Weather history can give us an idea of our current snowpack, and weather forecasts can help us predict conditions before going out skiing.
Scenario
If a storm came in with no winds and cold temperatures and finished near freezing the night before and you want to go skiing, what avalanche problem would you expect to find? If you’re having trouble, try reading through the list of avalanche problems again. Which one does this sound like?
More Data
The answer to the last question is storm slab, but since we have simple data all we can issue is the simple forecast of, “there might be storm slab out there.” We still haven’t pinned down where in the terrain the potential problem lies, nor how big or how sensitive it might be. This is where more data will be useful…
- The storm came in with no wind and started out at 15F and finished at 30F. Weather stations at tree-line reported that snow amounts over 24 hours were 16”.
- At tree-line, how big do you think these storm slabs will be? Big enough to bury a person (D2)? A car (D3)?
- How sensitive do you think these avalanches are? Will they run naturally, or will they need a human trigger?
- How would you adjust these answers if we moved into the alpine and snow totals were greater?

Disprove or Verify
Eventually, it’s time to take your avalanche forecasting skiing with you and test it. Use your observations from the day along with information from the avalanche center. Did you think this weather could produce natural avalanches? Are there any natural avalanches? How deep is that weak layer? How does that compare to your forecast?
If your forecast was off, why? Is the weather station in a snowier or drier area compared to where you skied? Did the wind gauge get frozen and not report the wind? The more questions like this the more insight you can gain into information you might have missed or not given enough attention too. That said, be mindful of hindsight bias (knowing about an avalanche and thinking you would have been able to predict that avalanche). Keep track of your errors and adjust your forecast for the next day accordingly.
This might not go so well for you at first. Keep at it. Seek mentorship and opinions from people with different avalanche backgrounds and don’t be afraid to reverse engineer your local avalanche forecast. As avalanche and weather conditions become more numerous and complex, an avalanche forecasting worksheet can help organize your thoughts. You can ask your local avalanche education organization for these worksheets. However, some people use homemade spreadsheets or keep everything in a field notebook. Play the devil’s advocate while you’re out skiing: seek to disprove your forecast and then learn from it. Do your best to be objective with new information and be mindful to avoid confirmation bias. Remember that your forecast is just a guess. Observations (such as recent avalanches, cracking, whumping, and propagating ECTs) should take priority when making the decision to ski or not to ski in avalanche terrain.
Avalanche Forecasting at your own risk!
Avalanche forecasting can be a tricky, and backcountry skiing can pose dangerous conditions. Use this information cautiously and at your own risk. Voile is not responsible for any avalanche accidents that result from the information gained in this post. Be smart and stay safe out there! Furthermore, read “Getting Your Head Back in the Avalanche Safety Game” for supplemental information. Obviously, coming home after a day in the mountains is always the top priority!
“You ain’t gonna learn what you don’t want to know,” Bob Weir.
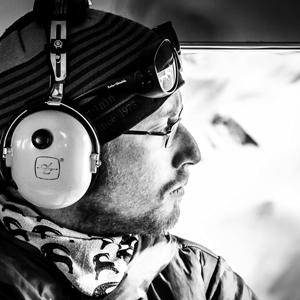
Aaron Diamond
Location: Jackson, WY
Top Gear Picks: Skyline 166cm / Hyper V-Tail 160cm and 190cm
Instagram: @aarondiamond13
Aaron Diamond is an AMGA Certified Splitboard Guide and avalanche educator based in Jackson, Wyoming. He guides year round for Exum Mountain Guides and has guided technical ski and snowboard descents on various Teton summits including the Grand Teton, Middle, Teton, Nez Perce, and Mt Moran. In the summer months Aaron works as an alpine climbing guide on Denali and throughout the Greater Yellowstone Ecosystem. He is alway psyched to share his backyard with experienced and new backcountry travelers
In his free time Aaron enjoys spending time in the splitboarding in the Tetons, or exploring the lesser known areas of the Alaska Range with his friends. He has first descents in the Tetons, Andes, and Alaska Range, including unrepeated splitboard descents of the Ramen Route on Mt Hunter (14,573ft), Mt Foraker’s Sultana Ridge (17,400ft), The Fat Calf Couloir on Pico Polaco (5995m) and the SE Face of the Gilkey Tower (12,320ft).
Share this Post